The more life I go through, the more I realize that my focus must be on the process rather than the result.
As a kid the focus was always on the result. Completing grades, winning soccer tournaments that kind of thing. I'm sure that other kids were enjoying the journey, but I wasn't. The journey wasn't even on my radar. I was mostly concerned about "the next thing". Finishing the school year, soccer season starting, soccer season ending, summer camp, going home, the next school year, Christmas.... Eventually it was finishing university and getting a job, then it was having a baby, then another and then going back to university to become a teacher.
Now I'm sitting in limbo land. I have no control over the next step - getting a teaching position. I have done my part. My resume is all spiffy, I've applied to all the districts that take general applications and I have added to my morning routine visiting all the various websites.
The question I keep finding myself asking is "what do I do next". I find that I've been avoiding doing stuff that I know will take along time (anyone remember that postage stamp table cloth I've been working on for months). I have this need to finish things and move on. It's incredibly unsatisfying. I end up never being happy and that has got to stop. I need to enjoy the things I am doing rather than simply doing them.
So, in this spirit, I am once again working on my tablecloth. I am spinning for the sake of spinning rather than focusing on what I'm going to knit with the yarn and feeling impatient that it's taking so long.
What are your journeys? What processes are you enjoying? Work with me on this and lets all enjoy life a bit more.
Saturday, May 18, 2013
Tuesday, April 2, 2013
The Combs in Action
With my new combs ready to fight the fleece, I got to work washing and making nice stacks of locks. :)

I don't seem to have any pictures of the singles, but here's on of the sock weight 3-ply. Isn't it pretty?

I am so incredibly pleased with how this turned out. It makes me smile everytime I think about about this yarn.


For some reason, I find green a hard color to get a good picture of. This is about the best I have. Hopefully I can get a better one soon. I am waiting for my new needles to come so that I can make a gorgeous pair of tightly plied hard wearing (I hope!) socks.

I don't seem to have any pictures of the singles, but here's on of the sock weight 3-ply. Isn't it pretty?
I am so incredibly pleased with how this turned out. It makes me smile everytime I think about about this yarn.
For some reason, I find green a hard color to get a good picture of. This is about the best I have. Hopefully I can get a better one soon. I am waiting for my new needles to come so that I can make a gorgeous pair of tightly plied hard wearing (I hope!) socks.
Wednesday, February 20, 2013
I am in love
Oh Hand Combs!!!!!! Where have you been all my spinning life! I cannot believe I have gone this long without. For those of you who do not know what hand combs are, they are these medieval looking pieces of weaponry for attacking fleeces.
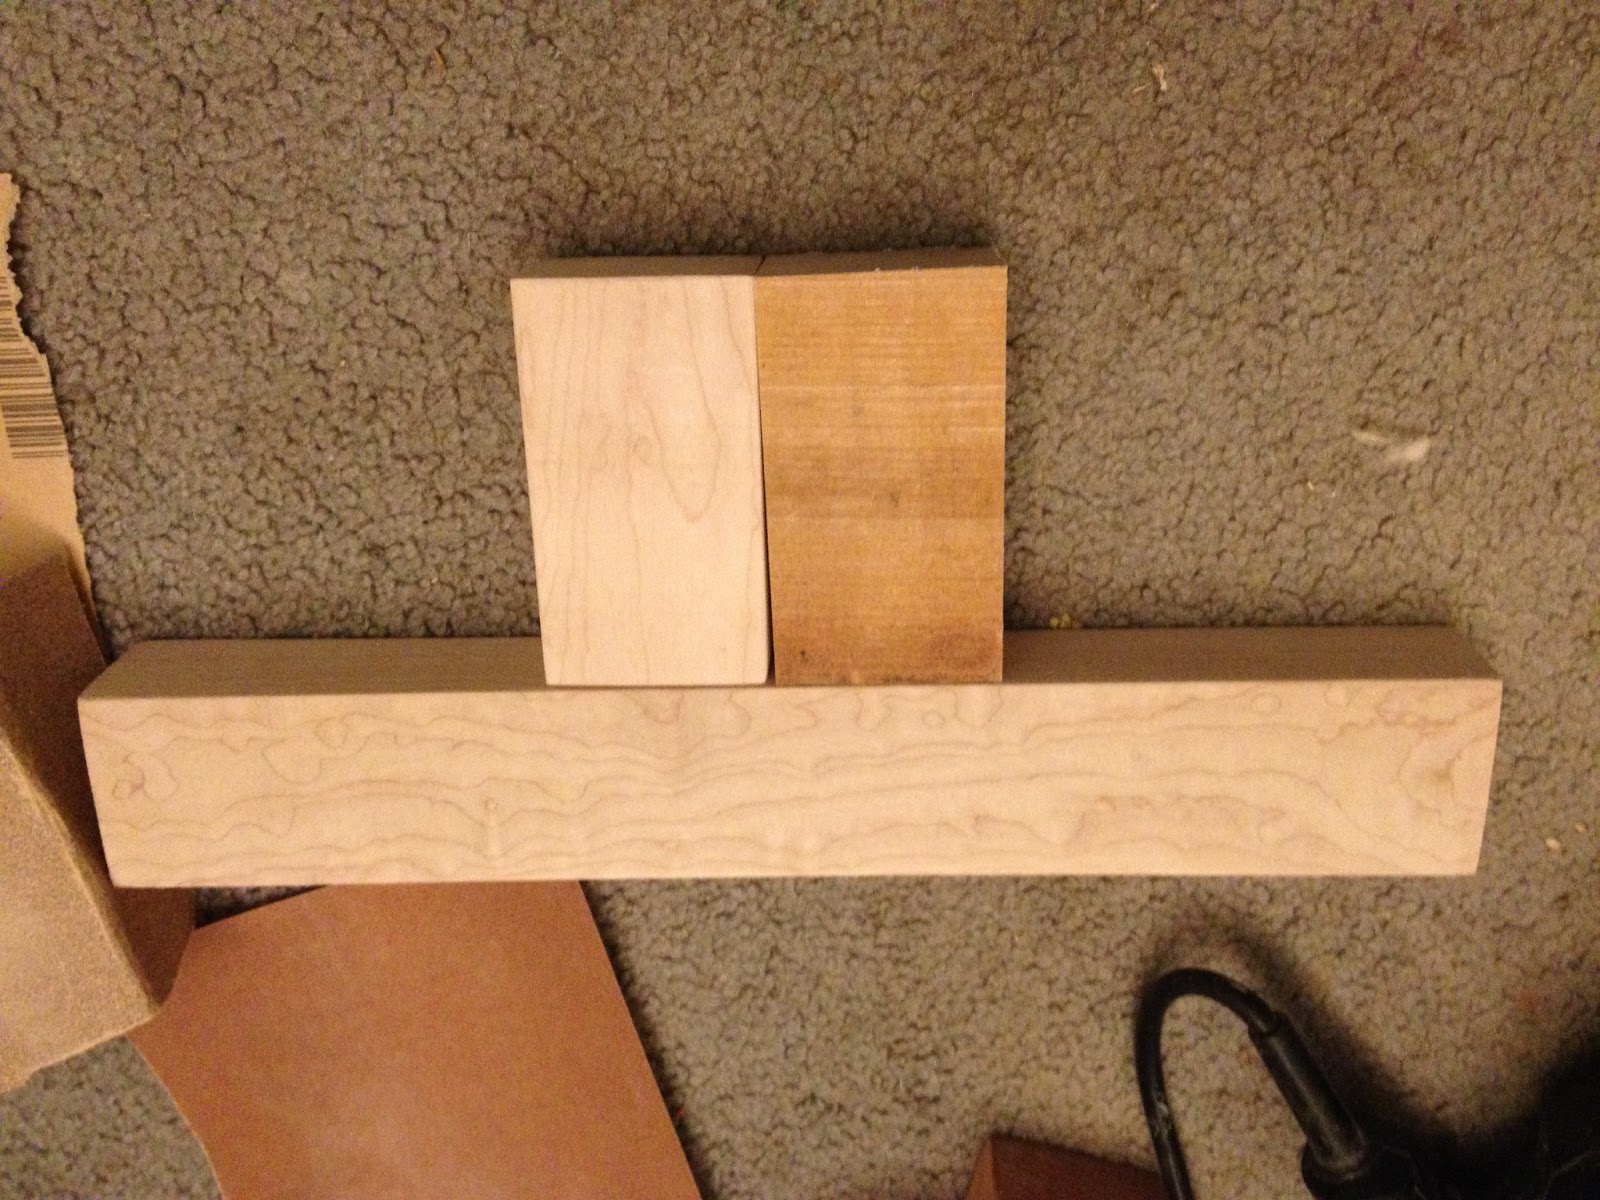
I did alot of looking on the internet at different combs. I did alot of looking at our bank account for money to buy these combs. And then I started looking at blogs about making them!!! Off to the fancy wood store I went and came back with a piece of maple. Then I started measuring and designing and finally I sent DH back to the fancy wood store to have them cut the small plank using equipment that I can only dream of having in my house.
Here is the cut wood. All nicely bound in plastic wrap!

First step! Sand. So - here's something that might not take other people by surprise, but I hadn't really experienced it before. Maple is one of those hardwoods that's actually hard... It took alot of work to sand it down.

One of the side of the plank was this dark color. I don't know if that's oil from the mill or what, but it was on the side with saw marks and it was HARD to sand off.
So pretty. This is a crappy pic of the absolute beauty that emerged from the application of the Danish Oil.

After doing the first hackle and comb with the hand drill, we decided to get one of the power tools we have both lusted after for years. (and yes - we have safety goggles that were worn every time after this pic)

Hackle and a comb. (1st tube of epoxy)

All done. the 2nd comb still needs to be oiled, but that will happen soon. the handles are actually the same length, one of the combs is just leaning a bit.

Trying it out. Yummy locks!


Friday, February 15, 2013
Still no name!
OK folks, this is getting serious. I got my wonderful Kiwi 2 for Christmas. I assembled it and started spinning. I felt a connection to the wheel, but no name came to me. I figured that once I stained and oiled it, the name would come...
So, I took it apart and got to work. I used Minwax for the wheel, flyer and whorl. I started with a wood conditioner (promised by the lady at Rona to make the stain go on more evenly) and then used the Minwax stain in Jacobean. I asked about the water based ones and got a very non-committal response about how nice they would look... So, I went with the toxic, make piles of rags spontaneously combust, stuff. I then used Danish Oil in Natural for the rest of the wood.

I LOVE the way it turned out. It needs another coat of oil (you can see a dull patch on the wheel, and there are other dull patches on wood). So I guess the 2 coats I did according to the instructions wasn't quite enough. That's OK though, because my next project has me using a bunch more Danish oil -so I'll get them then.


And, of course, I needed to celebrate by spinning something. I was also hoping that a name would come to me while using my new beautiful wheel... This is still from my friend's MIL's sheep. I'm finally getting the hang of hand carding. And for this yarn, instead of using the fiber as a rolag (so rolling it the short way off the cards), I turned the fiber and rolled it the long way and then pulled that out into a sliver. It meant that my fibers were mostly all pointing in the same direction and I was able to spin a nice, thin, even single. I then N-Plied it to make, what I'm guessing, is a fingering to sport 3-ply. I ended up with just over 200 yards (from counting the loops of the niddy-noddy) which weighs 122 grams. So - I'm still spinning very "heavy"... My yarn is very dense and I don't quite know how to change that.


So - now that you've ready through that. Any suggestions for a name? Gimli is about the only one that's coming to mind, but it seems so silly... Help me!
So, I took it apart and got to work. I used Minwax for the wheel, flyer and whorl. I started with a wood conditioner (promised by the lady at Rona to make the stain go on more evenly) and then used the Minwax stain in Jacobean. I asked about the water based ones and got a very non-committal response about how nice they would look... So, I went with the toxic, make piles of rags spontaneously combust, stuff. I then used Danish Oil in Natural for the rest of the wood.
I LOVE the way it turned out. It needs another coat of oil (you can see a dull patch on the wheel, and there are other dull patches on wood). So I guess the 2 coats I did according to the instructions wasn't quite enough. That's OK though, because my next project has me using a bunch more Danish oil -so I'll get them then.
And, of course, I needed to celebrate by spinning something. I was also hoping that a name would come to me while using my new beautiful wheel... This is still from my friend's MIL's sheep. I'm finally getting the hang of hand carding. And for this yarn, instead of using the fiber as a rolag (so rolling it the short way off the cards), I turned the fiber and rolled it the long way and then pulled that out into a sliver. It meant that my fibers were mostly all pointing in the same direction and I was able to spin a nice, thin, even single. I then N-Plied it to make, what I'm guessing, is a fingering to sport 3-ply. I ended up with just over 200 yards (from counting the loops of the niddy-noddy) which weighs 122 grams. So - I'm still spinning very "heavy"... My yarn is very dense and I don't quite know how to change that.
So - now that you've ready through that. Any suggestions for a name? Gimli is about the only one that's coming to mind, but it seems so silly... Help me!
Saturday, February 2, 2013
February Challenge
I'm hoping I don't regret this, but here is my challenge for February.
1) Sewing: I am going to finish my Postage Stamp Tablecloth. I have the 3 green blocks done. Next I need to cut the squares for the blue blocks and make them. Then figure out how I am going to sash them together and do that. I think that it is reasonable to get this done this month.
2) Knitting: I am still working on my sweater. I am on my 4th ball of yarn. Now that I have the directions figured out, I'm loving this sweater.

3) Spinning: I am going to finish spinning the Sheltand top I got for Christmas. It is going to be what I knit my prototype of my shawl in. So - I need to finish spinning, then ply, and then dye it a beautiful color. I think I need it in dark greens and teals.
4) Designing: Thanks to some good friends, I have the lace border figured out for the shawl I've been dreaming up in my head for the last couple months. I need to figure out how to do the short row part to turn the corner, and design the body of the shawl. Having a rough prototype for each section seems like a good goal for February.

More information on this challenge and link up at:
1) Sewing: I am going to finish my Postage Stamp Tablecloth. I have the 3 green blocks done. Next I need to cut the squares for the blue blocks and make them. Then figure out how I am going to sash them together and do that. I think that it is reasonable to get this done this month.
2) Knitting: I am still working on my sweater. I am on my 4th ball of yarn. Now that I have the directions figured out, I'm loving this sweater.

3) Spinning: I am going to finish spinning the Sheltand top I got for Christmas. It is going to be what I knit my prototype of my shawl in. So - I need to finish spinning, then ply, and then dye it a beautiful color. I think I need it in dark greens and teals.
4) Designing: Thanks to some good friends, I have the lace border figured out for the shawl I've been dreaming up in my head for the last couple months. I need to figure out how to do the short row part to turn the corner, and design the body of the shawl. Having a rough prototype for each section seems like a good goal for February.

Monday, January 21, 2013
This Week's Motivation
I have high hopes for this week.
School: I am caught up on my readings from the past weeks, so this weeks goal is to stay caught up. I think that should be doable!
House: Gwen got some new toys yesterday. My goal is to unpack them and get them integrated into our current toys. I even have some progress! The Lego is now sharing its table with this marble run. Gwen begged and begged and begged for me to put it together. I started working trying to follow the picture on the box. It would collapse and I would rebuild. Then it would collapse and I would rebuild. Then Gwen would "help" or drop a marble in and it would collapse. I needed about 6 more arms. So, I just made my own tower. Then she sobbed because I hadn't used all the pieces and refused to even look at it for a good hour. Kids!!! Luckily, after a nice snack she decided that she would deign to give it a try and really liked it.
Knitting: I am finally making progress on my sweater. The yarn is soft, the color is perfect and I like the pattern. I'm hoping to knit 2 of the tiny little yarn balls on it this week. I bought 14 (I think I will need 12 - but the balls were cheap, so I didn't want to run out). If I finish 2, that will take me to 3/14 or just over 20% finished!!!
And finally, I want to sew at least the last 2 green blocks for the table cloth. Ideally, I would like to also cut the squares for the blue blocks, but lets not get too ambitious.
Anyway, lets see how I do putting my weekly goals out for public consumption and accountability.
Sunday, January 20, 2013
Fill-The-Gap Cowl
I love the look of cowls. I love how they are scarves that don't have annoying ends that come unwrapped or are bulky under my coat. But, I've never really had luck wearing any of the cowls I've knit. They are either too bulky to fit nicely under my jacket, or they are too loose and don't actually stop the wind from going down my jacket. After trying to knit a bunch of different patterns and not having them work, I finally put a bunch of them together and came up with the Fill-The-Gap cowl.
This cowl is constructed from the bottom up. First you knit the garter stitch bottom
band. Then, using decreases and short
rows you shape the body of the cowl.
Once you have reached the size you want, you finish with a matching
garter band.
Here's a bad pic. Hopefully I will get a better picture with my jacket so you can see the full effect.


What you need:
Needles: US 7 - 4.5 mm
Gauge: 21 stitches/4 inches
Yarn: 100/150 yards of DK weight.
Glossary:
S2KPO: Slip 2 stitches together knitwise, knit 1, pass the 2
slipped stitches over the knit stitch. (This makes a centered
double decrease.)
Bottom Edge:
Cast on 131 stitches, place marker, join to work in the
round and purl 131 stitches.
Round 1: K64, S2KPO, K64
(129 stitches)
Round 2: P63, S2KPO, P63
(127 stitches)
Round 3: K62, S2KPO, K62 (125 stitches)
Round 4, P61, S2KPO, P61 (123 stitches)
Round 5: K123 stitches
Cowl Body:
This section is worked using paired decreases and short
rows. First you are going to just work short rows until the cowl measure 3
inches from the beginning tip. Then you
are going to start doing decreases on the knit side. Here is a good tutorial on short rows: The Purl Bee
Short Row 1: K63, wrap and turn
Short row 2: P3, wrap and turn
Short Row 3: Knit to the wrapped stitch, knit the wrapped
stitch making sure to pick up the wrap, K1, wrap and turn.
Short Row 4: Purl to the wrapped stitch, purl the wrapped
stitch making sure to pick up the wrap, P1, wrap and turn
Repeat rows 3 and 4 until the cowl measures 3 inches from
the tip. End with a purl row. Each row will increase the number of stitches you are working.
You are now going to decrease every second knit row. The
purl rows will remain the same as row 4.
Short Row 5:SSK, knit to 2 stitches before the next wrapped stitch,
K2Tog, knit the wrapped stitch making sure to pick up the wrap, K1, wrap and
turn.
Short Row 6: same as row 4
Short Row 7: same as row 3
Short Row 8: same as row 4
Repeat this 4 row set 6 times.
Then start decreasing every knit row (so alternate Short Row
5 and Short Row 4) until there are 10 stitches left between wraps which you
have not yet knitted. (So - as you knit the short rows, the number of stitches you were working increased, and the number of stitches that were left alone decreased.)
With the knit side facing you, knit to the marker picking up
the wrapped stitch as you go. Then knit
another round picking up the other wrapped stitch (you are knitting the entire
round including the 10 stitches that you haven’t knit since the border).
Knit until short side (where the round begins) measures 2
inches.
Top Edge: (3 garter ridges)
Round 1: Knit 1 round
Round 2: Purl 1 round
Repeat these two rounds 2 more times.
Bind off using Jenny’s “Surprisingly Stretchy Cast
Off”
Weave in ends and steam block.
Subscribe to:
Posts (Atom)